First International Trip Mistakes That Cost Real Money
International travel has gotten complicated with all the hidden fees and fine print flying around. As someone who has logged fourteen international trips across four continents, I learned everything there is to know about losing money in ways that feel completely invisible until you’re staring at your bank statement back home. Today, I will share it all with you — the specific mistakes, the exact dollar amounts, and the fixes that actually work.
Most travel advice tells you to “watch out for fees” or “get travel insurance.” Useless. I’m going to walk you through what drained my bank account, trip by trip, with real numbers attached. The travel industry profits on your ignorance of these traps. Airlines know you won’t read the baggage policy. Banks know you won’t notice the 8% markup until you’re already abroad. Phone carriers count on you panicking and accepting whatever roaming rate pops up on your screen. I’ve done the panic. I’ve paid the fees. Now I know better — and you will too.
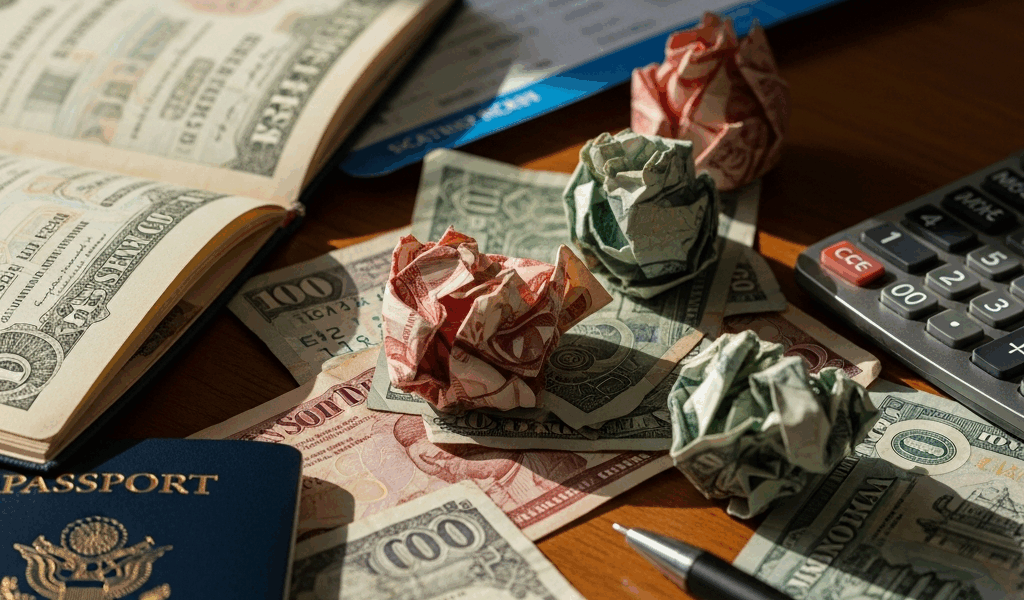
Dynamic Currency Conversion — the $200 Trap
But what is dynamic currency conversion? In essence, it’s a fee dressed up as a service. But it’s much more than that — it’s one of the most quietly profitable tricks in the travel industry, and it’s designed to look helpful.
Picture this: You’re at a café in Barcelona. The bill is €18. The card terminal asks if you want to pay in euros or US dollars. The screen shows a friendly “conversion rate” that will “lock in your price.” This feels safe. Convenient, even. You tap the dollar option.
You just lost money.
When you choose to be charged in your home currency abroad, your bank doesn’t use the real exchange rate. They use a marked-up rate — anywhere from 3% to 12% above the actual market rate. On an €18 transaction, that’s 54 cents to $2.16 in pure profit for the card network and the acquiring bank. For doing nothing.
Over two weeks in Europe, a modest spender hits maybe 25 to 30 transactions where this option appears. Average transaction is around $40 USD equivalent. A 7% markup — right in the middle of the range — means you’re paying $2.80 extra per transaction. Multiply that by 28 transactions and you’ve donated $78.40 to Visa’s shareholders for the privilege of seeing your charge in a familiar currency.
I made this mistake on my first trip to Thailand. Frustrated by the confusion of unfamiliar ATM screens flashing numbers I didn’t immediately trust, I kept accepting the “convert to USD” option at ATMs and shops across Chiang Mai and Bangkok — using a scratched-up Chase debit card I’d had since college. Over ten days, I made that choice maybe fifty times. My transaction log showed I’d paid roughly $280 more than the official exchange rate warranted. Two hundred and eighty dollars. That’s four nice dinners. That’s a full day tour. That’s your margin for error on the entire trip. Don’t make my mistake.
The fix is brutally simple: always choose the local currency. Always. When the terminal asks, you want euros, baht, pesos — whatever the local money is. Your bank converts it on the back end at a fair rate. You’ll still pay a small margin, but it’s the true market rate, not a 7% penalty for feeling comfortable.
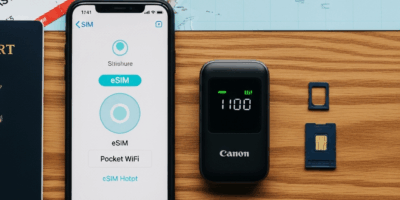
International Roaming Without a Plan
My friend Marcus landed in London without a data plan. His phone automatically connected to the local network. He didn’t even open any apps or stream anything — just let it sit in his pocket while he navigated to his hotel on offline maps he’d wisely downloaded before boarding.
His AT&T bill that month was $340 higher.
AT&T charges $2.05 per megabyte of data without an international plan. Verizon runs similar rates. One megabyte is essentially nothing — a single medium-resolution photo is 1 to 3 MB, a one-minute video is 4 to 8 MB. Even with data saver modes on and zero active use, background apps and location services can chew through 50 to 100 MB per day. At $2.05 per MB, that’s $102.50 to $205 per day in phantom charges. Per day.
Marcus had left his phone on for three days before he noticed what was happening. Three days of sleeping. His email pulling updates, his banking app running security checks, his weather app refreshing every hour. Background processes he wasn’t even aware of. Three days of that cost him over $300.
I learned this the expensive way too, though not quite as badly. Burned through $118 in roaming charges during a 36-hour layover in Singapore. I thought the airport had free wifi — it did, but it was slow — and I got impatient. Uploaded a few work emails and pulled down some Slack messages. That small impatience cost me more than a night’s accommodation in most of Southeast Asia. Probably should have opened with this section, honestly.
The solution I use now is an eSIM from Airalo or a local SIM purchased at the airport. An eSIM runs $8 to $20 for a week of data depending on the country. A local SIM is sometimes free, with the carrier covering activation costs. Either option costs roughly 1% of what roaming charges will do to you. You can set this up before you leave home — download the Airalo app, pick your destination, buy the eSIM code, activate it on your phone before you board. Done.
ATM Fee Stacking — Your Bank Plus Their Bank
When you withdraw cash from an ATM abroad, you hit what I call the triple tax. Your bank charges a foreign transaction fee — typically 1% to 3% of the withdrawal amount. The local ATM operator charges a flat fee to use their machine — usually $2 to $5. Some ATMs tack on a percentage markup on top of everything else. Three separate bites out of your withdrawal before you touch a single bill.
Withdrawing $200 from an ATM in Bangkok, I paid my bank’s 2% fee ($4), Bangkok Bank’s $3.50 ATM fee, and a 3% DCC-style markup I didn’t even notice until I checked my statement later ($6). That $200 withdrawal actually cost me $213.50. I only received full value for 93.25 cents of every dollar I transferred.
Do this ten times over a two-week trip — which is common if you’re trying to keep cash amounts small — and you’ve burned $135 in pure fees. That’s three nice meals. That’s a guided tour you had to skip.
Some banks have figured out that this is highway robbery and reimburse ATM fees. Charles Schwab reimbursed both my bank fee and the foreign ATM fee on every withdrawal I made across eight different countries. Credit unions like Connexus and Pentagon Federal offer similar setups. If your bank doesn’t reimburse, switching to one that does could save you $100 to $200 per trip — at minimum.
The secondary fix is withdrawing larger amounts in fewer transactions. Instead of ten $200 withdrawals, do one $2,000 withdrawal. The $3.50 ATM fee stays the same either way, but now you’re paying it once instead of ten times. The percentage fees also become less painful at scale.
The tertiary fix — and honestly the one I wish I’d understood earlier — is to use a credit card without foreign transaction fees for most of your spending and only hit ATMs for cash-only situations. The Chase Sapphire Preferred and the Fidelity Rewards Visa Signature both waive foreign transaction fees entirely. Over a two-week trip, that single switch can save you $50 to $100 compared to a standard bank card. I’m apparently a “carry two cards” person and this combination works for me while single-card setups never did.
Travel Insurance Gaps Nobody Reads
Your credit card’s travel insurance sounds comprehensive until you actually read it. Most premium cards include trip cancellation, baggage delay, rental car coverage. What they often don’t include: medical evacuation.
But what is medical evacuation coverage? In essence, it’s insurance that pays to fly you from a remote location to a hospital that can actually treat you. But it’s much more than that — it’s the difference between financial survival and financial catastrophe. A helicopter evacuation from a trekking route in Nepal to Kathmandu, followed by a medical flight back to the US, runs $30,000 to $250,000 depending on your location and where you need to go.
Your credit card will not cover this. The fine print explicitly excludes it. I discovered this by reading through the Amex Platinum’s coverage document line by line on a flight home from Lisbon, looking for gaps. There it was — medical evacuation excluded. Just sitting there in 9-point font.
A dedicated travel insurance policy that includes medical evacuation runs $80 to $150 for a two-week international trip. This feels expensive. It’s not. It’s the most cost-effective insurance you’ll ever buy, because the downside if you skip it is bankruptcy-level catastrophe. That’s what makes comprehensive coverage endearing to us frequent travelers — it’s the one expense that actually makes the math work in your favor.
There’s another gap almost nobody talks about: pre-existing conditions. Most travel insurance policies exclude claims related to pre-existing medical conditions unless you purchase the policy within fourteen days of your first trip deposit. If you have diabetes, a heart condition, or even managed anxiety, standard policies won’t cover you if something related to that condition happens abroad.
World Nomads and SafetyWing are built for backpackers and short-term travelers. For longer trips or more comprehensive coverage, IMG Global and GeoBlue are better options — both actually cover medical evacuation and have reasonable pre-existing condition terms. So, without further ado, let’s dive into a real example.
I spent $120 on a World Nomads policy for a three-week trip to Peru. Didn’t use it. But a traveling companion got food poisoning badly enough to need IV fluids at a clinic in Cusco — the kind of place that charges $800 for a few hours and a saline drip. That $120 policy covered the entire bill. She would have paid out of pocket otherwise. Food poisoning, bacterial infections, altitude sickness — these aren’t edge cases on international trips. They’re Tuesday.
Overpacking Into Checked Bag Fees
Budget airlines in Europe charge $30 to $60 per checked bag each way. Per bag, per flight. One bag, round trip, one intermediate connection — that’s $120 minimum. A family of four with checked bags across three flights pays $360 to $720 just for the privilege of bringing their stuff.
This sounds absurd because it is absurd. But it’s profitable, so airlines do it. Ryanair alone generated over €500 million in ancillary fee revenue in a single year. Your checked bag is a meaningful slice of that.
Frustrated by how much I’d overpacked for climate variety I never actually encountered, I paid Ryanair $52 on my first backpacking trip to check a suitcase that could have been a large carry-on instead. I had brought a sweater, a hoodie, a rain jacket, full jeans, shorts, and three pairs of shoes. I used maybe half of it. That was 2016. I’ve carried on only ever since.
A standard carry-on suitcase — the Away Carry-On, for example, or the Travelpro Maxlite 5 — runs 22 x 14 x 9 inches and weighs 10 to 12 pounds when packed. This fits everything you need for two weeks if you apply ruthless minimalism: seven shirts, two pairs of pants, one pair of shorts, one pair of shoes, one pair of sandals, underwear for four days, one sweater or jacket. Do laundry halfway through. Done.
Carry-on only is borderline life-changing for international travel, honestly. You move faster. You’re not standing at baggage claim carousels for 40 minutes watching the same black suitcase orbit the belt three times. You can change flights without stress. And you save $200 to $500 in bag fees alone over a two-week itinerary with multiple flights.
The one exception is staying in a single location for the entire trip. Then checked bags don’t hurt you operationally, and the fee is purely financial. But even then — it’s still $60 you don’t need to spend.
The Math of Avoidance
Let me total this up, because seeing the cumulative number is the part that actually changes behavior.
Dynamic currency conversion over two weeks: $80 to $150. Roaming charges on a three-day data mishap: $50 to $200. ATM fees across ten withdrawals: $100 to $200. Travel insurance skipped: $120 in coverage you’ll wish you had. Checked bag fees for a family of four: $360 to $720.
Total potential damage: $710 to $1,370 per person on a single two-week trip.
That’s an entire region of your trip budget. That’s the difference between budget hostels and mid-range hotels. Between street food and restaurant meals. Between a stressful trip and a comfortable one.
None of these mistakes are complicated to avoid. They all have clear, simple fixes that cost nothing or actively save money. The airlines and banks and card networks benefit from your ignorance, so they don’t advertise the solutions loudly — ever. But now you know. On your first international trip, you’ll be ahead of where I was, because you’ll sidestep the mistakes that cost real money before they cost yours.

Leave a Reply